
Local editing
It is possible to construct, maintain, and update your blog fully from GitHub. In this case, it is not necessary to download your blog’s files or modify them on your computer. However, when constructing complex posts involving code and figures, local editing can be more comfortable. Additionally, since GitHub Pages usually takes a few minutes to publish all your changes, modifying your blog locally allows you to more quickly see the results of your changes, including errors when they arise. In this post, I’ll show how to manage your blog locally.
What you need
- A GitHub account with a fork of this blog with repository name
username.github.io. - Either the GitHub Desktop app (recommended) or comfort using basic git commands in the terminal.
- An installed copy of the
jekyllutility. You should first install Ruby, after which you can use Ruby to install Jekyll. - A text editor. Jupyter Lab already comes with a basic text editor, but if you expect to write a significant amount of code in your career then it is worthwhile to find a text editor that you like. Visual Studio Code is my personal choice. Sublime Text and Atom are also popular.
Clone Your Blog
When you clone a repository, you download a local copy that you can modify. You’ll then be able to push changes back to the version on GitHub.
In GitHub Desktop, go to File –> Clone Repository. Follow the prompts to clone your blog from GitHub.com. You’ll also need to select a location for the files. Choose a location that you’ll be able to remember.
After you’ve cloned your blog, I suggest adding a directory called notebooks. You can store the notebooks that you use for your homework first drafts in here, and host them under version control on GitHub.
Serve Your Blog
Jekyll is a utility that transforms markdown files, like the ones in this repository, to valid HTML files. In order to see a visual representation of your website locally, you need to serve the blog. To serve the blog, follow the following steps:
- Open a terminal.
- Navigate using the
cdcommand to the directory containing your blog. - In the terminal, type the command
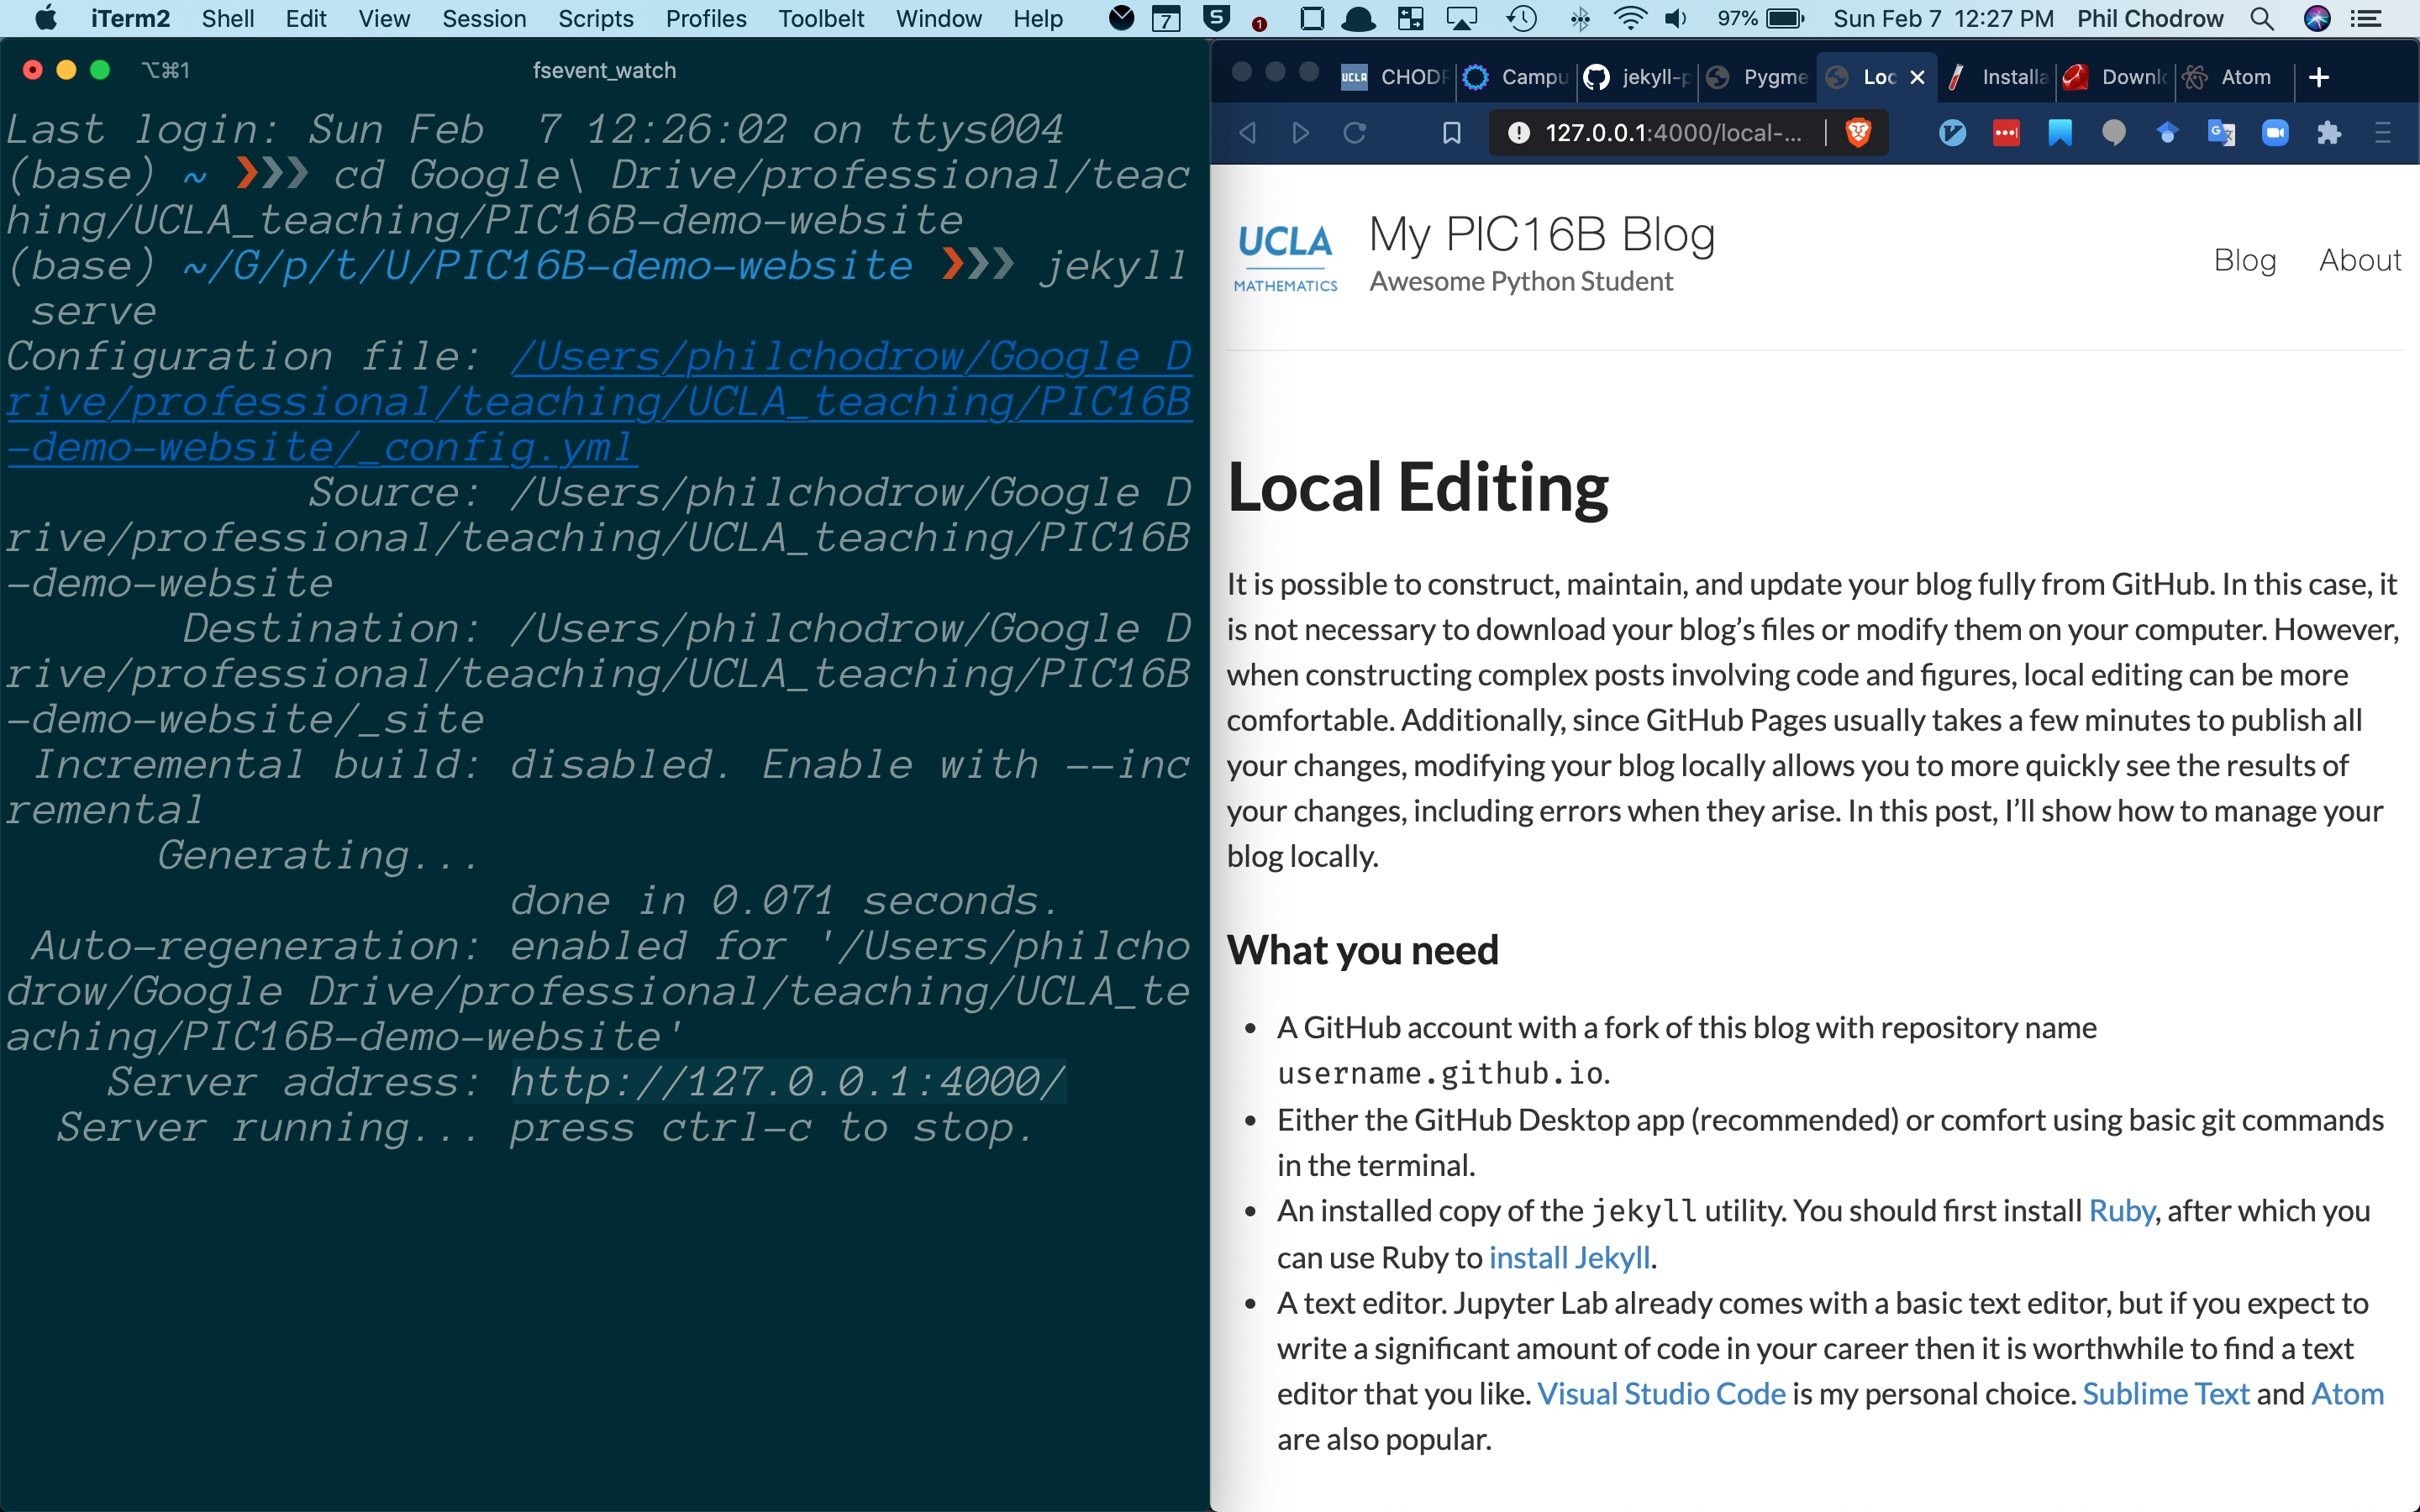
jekyll serve. You’ll see a few printed messages in the terminal. - Look for the server address, which will likely resemble
http://127.0.0.1:4000/. Paste this address into your browser. You should see your blog!
Changes that you make to your blog files will be quickly and automatically reflected in the locally served version of your blog. Here’s what this looks like in action. Note that, in the terminal on the left, I’ve included both the cd command to navigate to the location of the blog files, as well as the subsequent command jekyll serve.
Commit and Push
After you’ve made your desired modifications to your blog, you should then commit your changes in GitHub Desktop or a the command line. Next, you should push your changes to GitHub.com. After a few minutes, your pushed changes will be reflected on the live, online version of your blog.
A Few Shortcuts
GitHub Desktop
The GitHub Desktop application has a convenient option under the Repository menu, “Open in Terminal.” Choose this to create a new terminal at exactly the correct location! This lets you skip steps 1. and 2. above.
VS Code
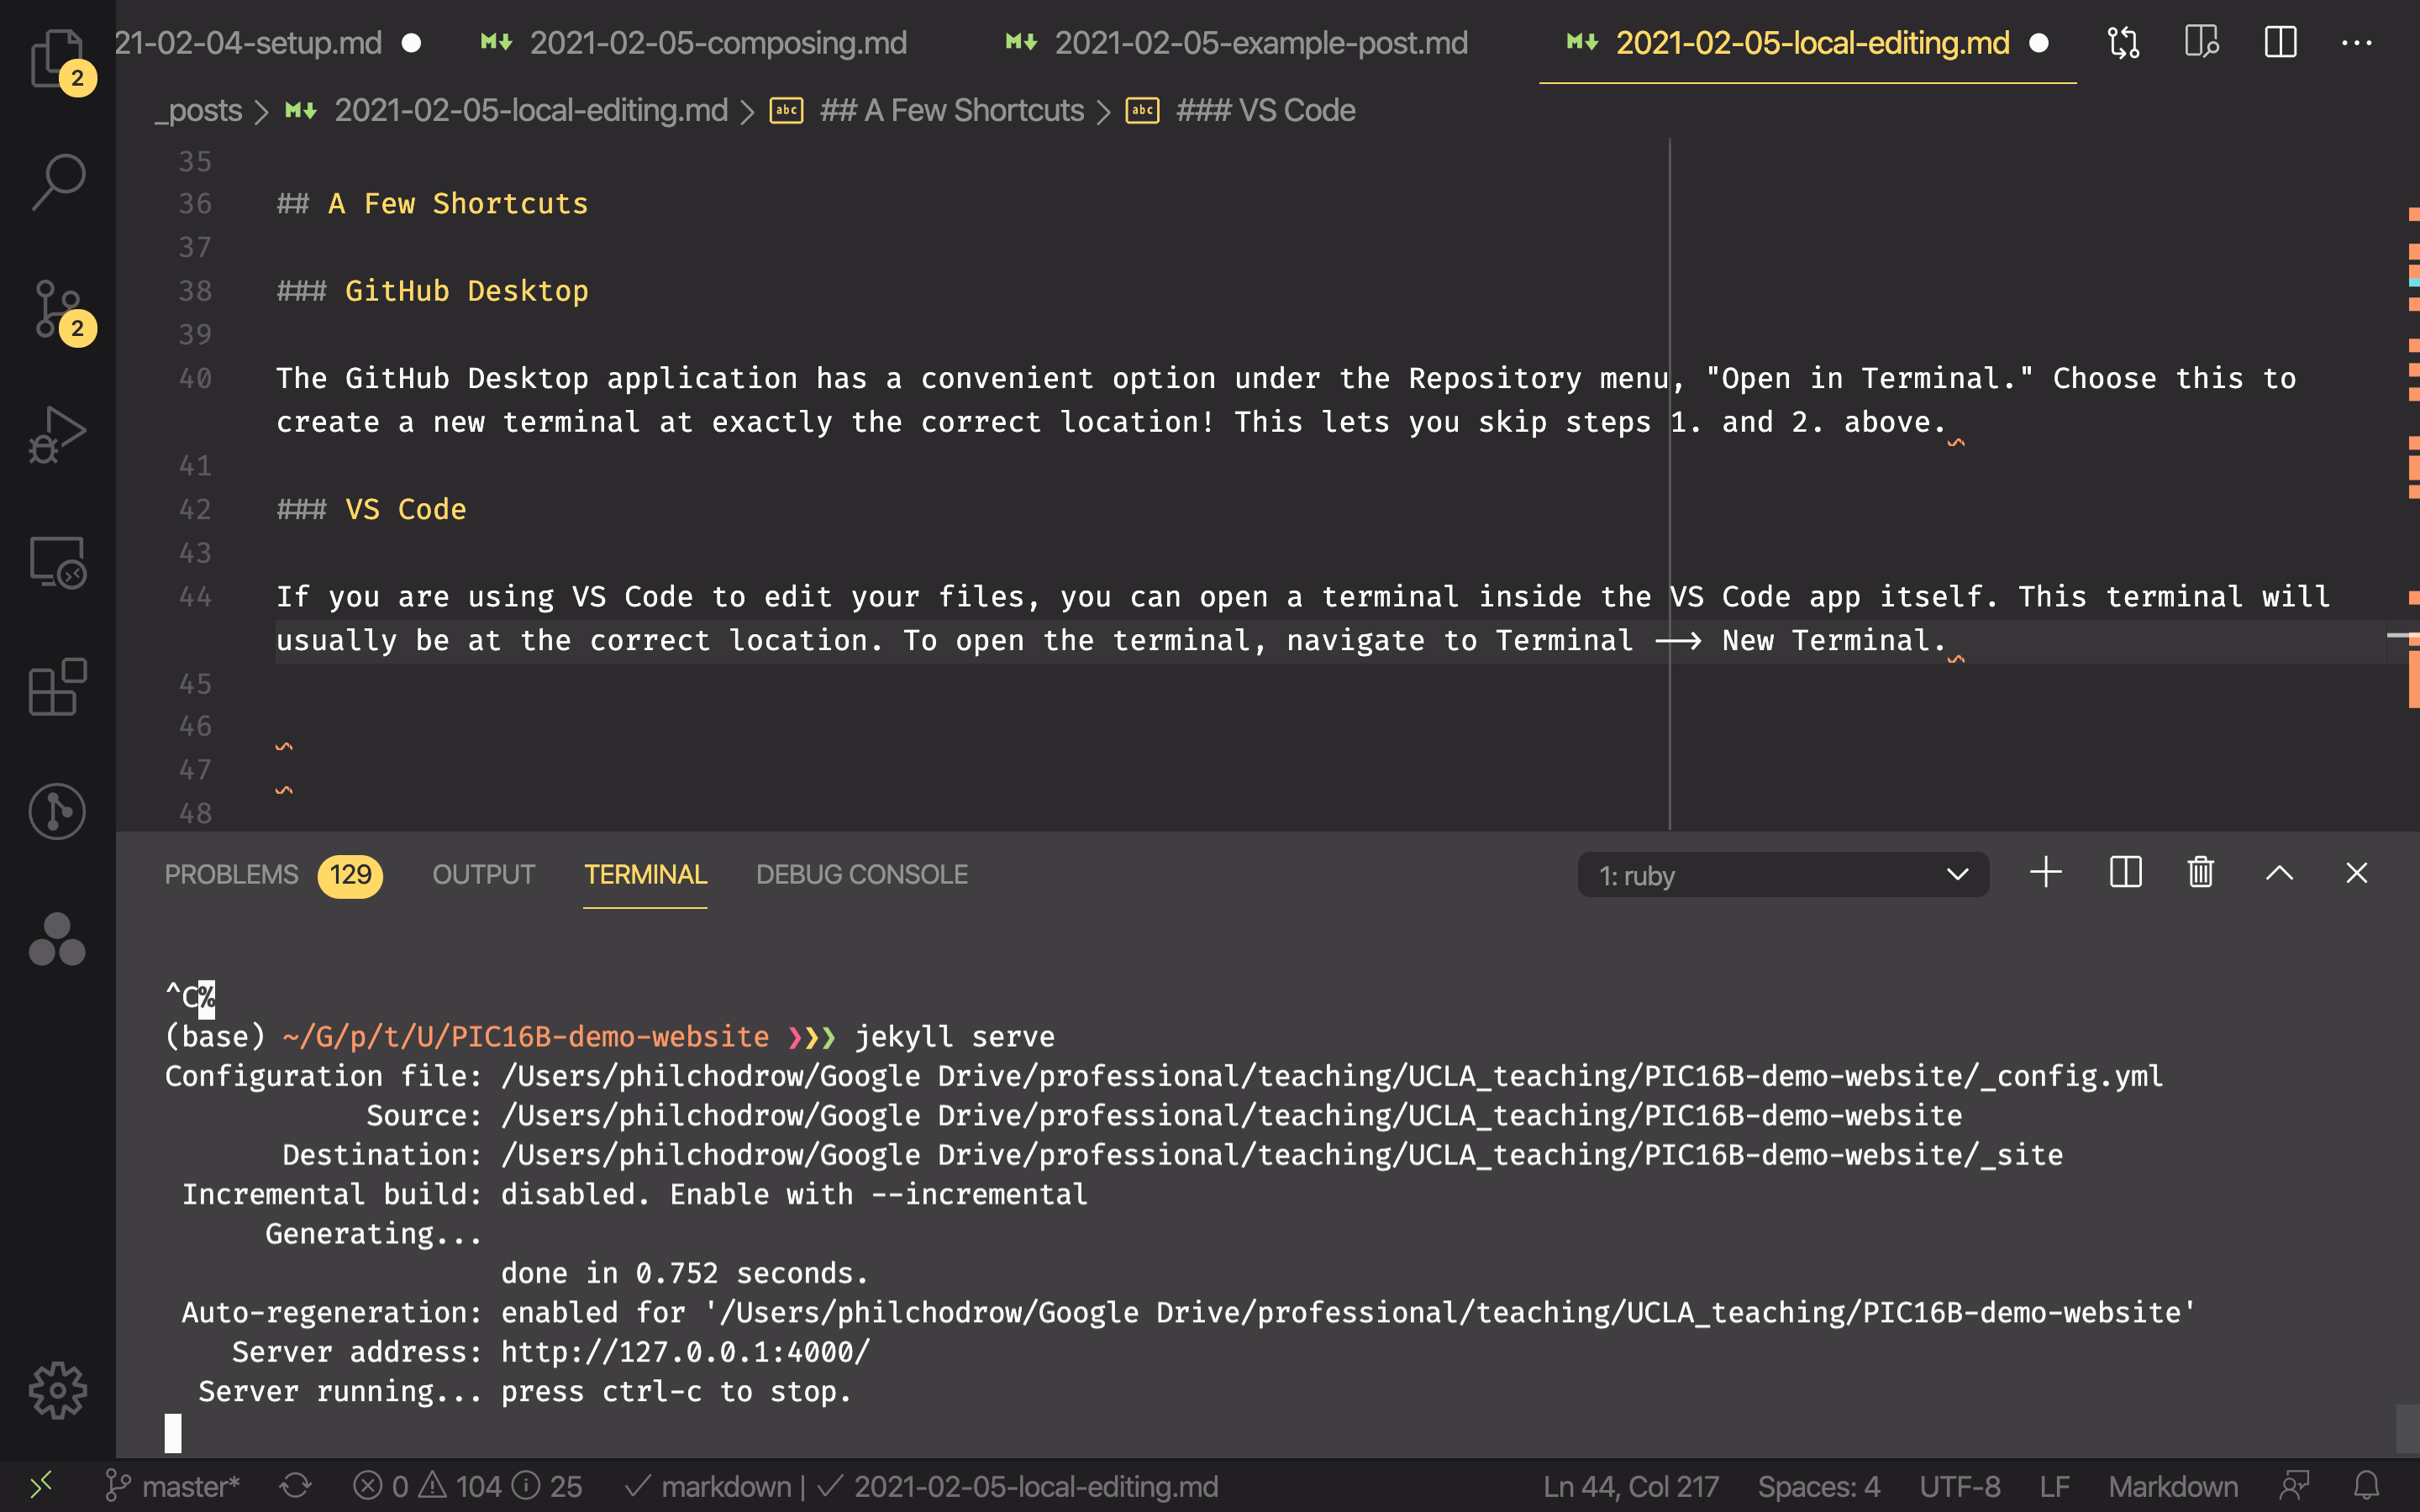
If you are using VS Code to edit your files, you can open a terminal inside the VS Code app itself. This terminal will usually be at the correct location. To open the terminal, navigate to Terminal –> New Terminal. This again lets you skip steps 1. and 2. above. Here’s a screencap of me editing this blog post while running the Jekyll server.
Many other text editors have similar functionality, although I can’t directly vouch for them since I don’t use them.